
Happy Halloween. everyone! Hope you all got lots of Trick-or-Treaters at your door, but still have plenty of candy left to hoard in that top cabinet where no one else will find it! What?! You know you do that too!
*****
First order of business on the new house definitely had to be the girls’ rooms. They were part of the upstairs that hadn’t yet been updated and I think they had clearly been painted for two young boys a looong time ago.
Thing 1’s room was a study in primary colors: red walls, yellow ceilings, and blue blinds.

Thing 2’s room was light blue on top and bright blue on the bottom with a wallpaper border around the center of the room with, I believe, palm trees and race cars.

Plus they both had the original, 23 year old carpet! Definitely time for an update.
The very first day we were in the house, I started patching the holes in the walls. Every single door in the upstairs (and some downstairs) had a circular hole, shaped suspiciously like a door knob, in the wall behind it. Definitely young boys used to live here!
Three days after we moved in, I was ready to paint. My good friend (and new neighbor) volunteered herself and her mom to be my painting buddies, so we were able to knock out both rooms in one day (after, of course, one of my helpers removed the wall paper border and the other spent several hours cleaning the walls). I was (pleasantly) surprised that each room took only one coat of primer and one coat of paint to cover those bright walls.
We’re planning on replacing the trim around the windows/doors and baseboard, so we didn’t have to be careful about not painting that, which really helped speed up the process.
*****
This house is 23 years old, so the floors are really getting squeeeeeky. We had already scheduled the carpet installers to come in another week, but we decided to pull up the carpets right away to give us a chance to see what we could do about those squeaks. Of course, this meant the girls had to live without carpet for a week, but I think the promise of super-soft carpet laid over nice quiet floors made it palatable.
My husband had done some research and found this product called Squeeeeek No More that did the job perfectly! It’s basically special screws that you drill into your subfloor and joists, then you use a special tool to snap off the top of the screw to just a smidge under the subfloor, so nothing sticks up. The kit also comes with a doo-hickey that stops your drill when you’ve set the screw deep enough. You can use it on carpeted floors, as well as hardwood and laminate!

They didn’t ask me to say this, but these things were AWESOME! Completely easy to use and they did just what the package said. Plus, they were pretty fun to use too! I had a great time bouncing around on the floors like a ballerina finding squeaks for my husband to obliterate.
Most of the squeaks were very easy to deal with: they just required one or two screws to tighten up the subfloor, but one of the rooms had a ridiculously tenacious squeak RIGHT AS YOU WALKED IN THE DOOR that we could not get rid of. I’d convince myself that it didn’t matter, that we could live with it. Then, I’d walk back into the room and SQUUEEEAAAAKKKK! There it would go again. We must’ve sunk, at least, 20 screws into this area. I was just about to finally give up (because we were almost out of screws), but decided to try one, last time. I drilled in one more screw and, lo and behold, it worked! No more squeak! I can’t wait to use them throughout the rest of the rooms too!
*****
After that, we were FINALLY ready for new carpet. When the day arrived, we moved everything out of the girls’ rooms and into the master bedroom. I wish I had taken pictures of that because our room was packed! The carpets went in and lickety-split, we had livable rooms for the girls! We had decided not to get new carpet in our room, since that carpet was relatively new, but MAN are we sorry about that decision. Now, you walk from the upstairs landing into our room and it’s a complete let-down for your feet. That decision definitely needs to be revisited!
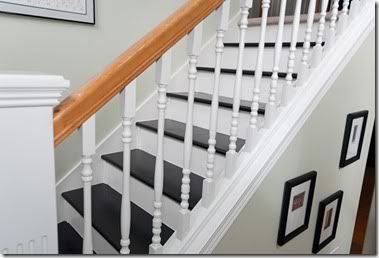
Anyway, I’ll give you a progress shot of the newly re-painted and re-carpeted rooms. They’re definitely not done (most notably, the trim needs to be replaced with big, beefy casings – Oh, and new blinds are one the way!), but they’re muuuch better already.

One could even sleep in here!


No comments:
Post a Comment