Saturday, October 30, 2010

Cover That Pillow!

You may remember that I bought some beautiful fabrics from Calico Corners this summer for curtains and throw pillows for my couch and that picking out that fabric was a little stressful for me.  But I finally got them done and they were beautiful and I was happy.

So imagine my displeasure when suddenly it wasn’t summer anymore and my nice bright pillows just didn’t fit with my Halloween decorations.  I knew I had to do something about those pillows and quick!  I also knew, though, that I didn’t want to spend a ton of money changing up the pillows for only two months worth of show (because, of course, they’ll have to change again for Christmas!).  So, off I went to Hancock Fabrics with very little hope of finding anything there.  The gods of fabric stores were smiling down on me that day because I found not one, not two, but three fabrics that I wanted to use (actually, one will be for Christmas).  And TWO of those fabrics were in the discount pile!!!

I knew I didn’t want to go full on fall colors.  As much as I love and want to copy the more subdued rooms I see in the blogosphere, I always seem to go for a punch of color, so I decided to embrace it this time and go with a blue, orange, brown theme.  Here’s the first fabric I found:

DSC_3218

Perfect!  I actually already had some nubby, brown pillows at home, so now I just needed an orange fabric.  I had already purchased some orange napkins and an orange table cloth that I thought I might be able to turn into pillows, but they were both just too bright.  Finally, though (in that wonderful discount pile), I found a orange that matched the inspiration fabric perfectly!

Now, back home to make pillows…

No, wait.  This is me we’re talking about here…

Now, back home to leave the fabric in a pile for a week and then decide I’m going to make pillows one day only to realize that I never actually washed the fabric and then do wash the fabric but lose my free time for the day so wait a few more days until I actually just decide to DO IT!

We have a ton of pillows hanging around in my closet doing nothing, so I knew I wanted to make envelope-type covers for existing pillows, rather than just adding to the pile of pillows that would need to be stored. 

I’m sure you all know how to sew better than I, but just in case, I’ll share how I made them.

First!  Cut the fabric.  You’ll want to cut the front piece as big the same size as your pillow form, plus 1” for seam allowances.  My pillows were 17”, so I cut the front piece in an 18” square.

The back is actually two pieces.  You’ll want to cut those so that one dimension is the same as your pillow front (e.g., 18”).  The other dimension will be half of the first dimension plus ~2.5” (e.g., 18/2 + 2.5” = 11.5”).  These two pieces will overlap to create the pocket where you can insert your pillow form.

DSC_3215(You may notice that these pieces aren’t actually square.  That’s because this isn’t the square pillow that I’m referencing above.  This is actually a rectangular pillow, but I figured I’d use the square pillow dimensions for explanation.) 

Next, iron your pieces flat!  While you have the iron out, grab the two back pieces and press a nice hem on one side (of each of them).  To do this, fold over the edge about 1/4” and press.  Then, fold that pressed edge over one more 1/4” and press again.  Then, take this over to the sewing machine and sew that hem down!  This will be the nicely finished edge of each side of the pocket opening.

DSC_3216

(Like my iron?  It’s older than I am!)

DSC_3218

Can you see the finished edge?

Now you get to start assembling the pillow.  Pin one of the back pieces to the front piece, making sure you have the right side of the fabrics facing each other.

DSC_3221

And sew that puppy on – just three sides.  Don’t sew the envelope opening closed.  It won’t work then…

Now, pin the second back piece to the other side of the front piece (right sides of fabric facing each other) and sew around the three closed sides.  Note that the two back pieces will overlap when you add the second piece.

DSC_3224

Now, turn it right-side out and stuff your pillow in (gently).  Rejoice in the beauty of your new pillow.

DSC_3225

This is actually a pretty easy sewing project.  I was able to whip through three pillows in no time flat.  And here they are:

DSC_3232

I love how these look much more fall-y, but that they’re still bright and playful.  And you know what’s almost the best part?  I bought the orange fabric, the blue paisley, and a red fabric for Christmas – enough to make at least three pillows from each and the whole lot came to less than $15!  Now that’s a project I can get behind.

Now, I just have to figure out how to take these fabrics over to the other couch which is dark brown.  I don’t want to just have the same configuration over there, but I do want to pull the colors from this couch over there to balance the room.  Any suggestions?

Friday, October 29, 2010

There’s a Mouse in the House!

It’s pretty late to be posting Halloween decorations, but I’ve been meaning to post this for a while and Thing 2 really wanted me to share it, since we worked on it together.  So…

A while back, I was perusing the blogs and came across the cutest Halloween project for the stairs at Thrifty Decor Chick.  She had little mice running up and down her stairs!  How cute is this?

Thrifty Decor Chick Mice (Source: Thrifty Decor Chick)

I loved it and immediately decided to copy it wholesale.  Lucky for me, she even included a link to Martha Stewart with some handy, dandy cut outs.  I ran right out to get construction paper and spent an evening in front of the TV, cutting out mice.  Then, they sat in a pile for almost two weeks.

Finally, we had some free time and Thing 2 and I got to work taping our little rodents to the stairs and here’s how it turned out:

DSC_3237

I love how it gives a festive touch to our staircase, which usually gets the decorating shaft.  Kids also love it.  I think because it’s right down at their level, they’re immediately drawn to it.  It’s very cute to watch them the first time they see the meeces.  I think they think I’m a bit crazy, but that’s part of the fun of Halloween, right?

DSC_3240


BTW, I’ve had several people ask me what colors I used to paint my stairs.  I had always meant to post that information, but never got around to it.  Since this is a post about my stairs, I’ll add it here:

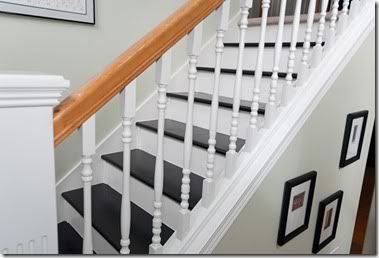
The black is SW Tricorn Black.  It is a great, true black.  The white is SW Creamy.  It looks crazy yellow on the sample, but feels really clean and bright in our rooms.  These are also the colors I used to paint my kitchen cabinets and island.


I'm linking this up to:

Monday, October 11, 2010

Quick and Inexpensive Picture Shelves

Waaay back in February or March, when I finally got my act together and painted the woodwork in our family room, I also arranged a picture wall behind our couch.  I never really liked it (though I could never pinpoint why) and so I never actually finished putting pictures in the frames.

If you look closely in this picture, you’ll see that many of the pictures have the same photograph of a lovely young couple (who looks nothing like us) AND that the two big frames in the middle still have plastic around the corners.

DSC_1837

(I think it actually looks better in this picture than it did in real life.)

For the past several months, every time we’ve had people over, someone has gotten a laugh out of the fact that we are prominently displaying pictures of people we don’t even know.  Har har har.

Last Friday, that all changed!  Ever since school started, I’ve been looking forward to having my Friday’s off, with no kids, to prepare for the weekend and to get some projects done.  Unfortunately, ever since school started, I’ve been out of town or sick or both on Friday.  Last Friday was the first day that I was home, alone, and healthy and I made the most of it!

I have been eyeing the white shelving in the dining room at Young House Love for a while now, but I haven’t wanted to spend any money, so imagine my excitement when Ana at Knock-Off Wood posted instructions on how to build a $10 shelf that was very similar.

Friday morning, I hatched my plan and, after dropping Thing 1 and Thing 2 off at school, I hit Lowe’s.  I had measured earlier and decided that my shelves needed to be 7” long, so I was going to need to cut down my wood.  I decided to have Lowe’s do it, since it would be so much faster than me having to measure and cut each piece (plus, I try to avoid using tools that can remove digits when I’m home alone).

I got home, pulled everything into my workshop (read: family room) and got started.  Believe me when I say these things went together amazingly fast!  I actually built all three shelves in just over 45 minutes IKnowRight?!.  (Well, I built them in 45 minutes the first time…I actually had to take the last shelf apart and do it again, since I had put it together wrong.  There may have been swearing, but I can’t say for sure.  I might suggest adding a few minutes to actually double-check your work before you start drilling and gluing, but YMMV.)

I was by myself, so I couldn’t take pictures of the actual process, but here’s all I did:

1) Have the nice people at Lowe’s cut your 1x4s and 1x2s down to size.

2) Screw one 1x4 to another 1x4

3) Glue the 1x2 onto the front and secure it with finishing nails

I would recommend using clamps to hold your pieces together as you’re securing them.  ESPECIALLY if you’re doing this alone.  (Though I might recommend slightly smaller clamps that don’t fall over because they’re top heavy…)

DSC_3200

If you need more hands, heavy battery-powered drills make nice weights.

DSC_3202

Here they are after 45 minutes:

DSC_3203

And getting painted:

DSC_3204

Thing 1 helped me hang them when she got home from school.  (That’s definitely a two person project!)

DSC_3206

And then I ran around the house, grabbing every picture frame I could find.  The girls actually had a bunch of fun with that because I was pulling out frames that had been in storage for a while, so we were seeing pictures we hadn’t seen in ages.

I through the pictures up in any old place because I was in a hurry as it was almost time for hubby to get home.  I like to do projects while he’s at work and then hide all the evidence and see how long it takes him to notice.  It’s how I keep our marriage exciting.  I know he appreciates it and feels no pressure.

So, here’s what it looked like when he got home:

DSC_3207

He noticed it right away.  (Lucky!)  Of course, it is pretty obvious and, while I had hidden all the evidence, it IS a bit difficult to hide the smell of paint, so he had a hint that he should be on the lookout.

I’m thinking I really like it.  The picture frames are all a little orange-y, so I’ll be painting them white.  I’ll probably need to thin them out a bit too, so it’s not quite so heavy.  The new shelves next to the built-in shelves makes that side of the room much heavier than the window side, so I’ll need to figure out how to add some weight to the other side, but all in all, I’m quite pleased with my quick Friday project!


DSC_3208

Friday, October 8, 2010

I’m Still Here – SortOf

Possibly you’ve noticed that I’ve been MIA for the last three weeks and really not much present for the few months before that.  I’ve been really struggling for a while with trying to decide what I want my blog to be and I can’t come to any decisions, so I’ve been avoiding it.

I’m not much of a writer.  I’ve never liked journaling and I’m not sure that I have anything new to say that hasn’t been said about a million times all over blogland, so I know I’m never going to be an every day blogger.

I’m not a decorator.  I actually have a really hard time decorating my house.  I think I’m more of a macro-design person.  I can paint a room or do a big project, but when it gets down to accessorizing, I got nothin’.  So I won’t be sharing all the cute new ways I’ve changed up my furniture and my decor.  I would be happy if I could just get a room “decorated” and then be able to leave it for a few years.

So, a while back I made a decision that this blog will just be here to share projects that I’ve completed that I won’t force myself to come up with post topics when there’s just nothing for me to write about.  The decision was half-hearted, at best, though and I couldn’t keep myself from looking around the house for the next project.  There are SO MANY projects that I want to do, though, that I can’t decide which one to start on.  I look and look for things that I want to change about my house so I’ll have a project…so I’ll have something to post about.

About a week ago, though, I realized that I’m not really enjoying my house.  I’m just walking through it, feeling not completely happy with the projects that I’ve finished and thinking about all the other things that need fixing.  Don’t get me wrong, I did that before I started the blog, but the blog just adds a little bit of extra pressure in the back of my head to pick a project (any project!) and get started, so I’ll have something to share.

That’s just not how I work, though.  I tend to go in fits and starts with my projects.  I’ll get a ton of motivation and get three projects started.  The projects, of course, always take longer than I thought, so as I finish them, I get wiped out and, by the time I’m done, I need a break.  So, I’ll slouch around, unmotivated, for a month or more and then suddenly, I’ll find my motivation again.

So, I’m realizing that I really need to change how I think about the blog.  I need to go back to its original purpose: to just share projects that I’ve completed in my own time (and maybe participate in a few linky parties).  The thought of doing that worries me a bit, though, because I really enjoy the conversations I’ve had with all the people I’ve met here in blogland and I worry that, if I only post once or twice a month, that will all dry up.  (Plus, as you all know, comments are REALLY fun to get!  I’ll miss heading to my Inbox to see if anyone’s commented on my latest post.)

I think for my own sanity, though, I need to take a step back.  From your point of view, it would seem I’ve already done that, but I still need to take that mental step and I’m going to do it today.  I’ll still be posting, just not as much as I used to (which, admittedly, was never a ton).  I hope you stick with me as I figure this out!

And, having said that, don’t touch that dial:  I got my motivation back!  I started a new project today and I’ve got at least one more that I’m ready to get started on!

Related Posts with Thumbnails