
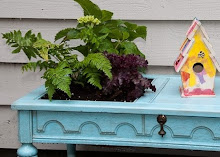
You may remember that I bought some beautiful fabrics from Calico Corners this summer for curtains and throw pillows for my couch and that picking out that fabric was a little stressful for me. But I finally got them done and they were beautiful and I was happy.
So imagine my displeasure when suddenly it wasn’t summer anymore and my nice bright pillows just didn’t fit with my Halloween decorations. I knew I had to do something about those pillows and quick! I also knew, though, that I didn’t want to spend a ton of money changing up the pillows for only two months worth of show (because, of course, they’ll have to change again for Christmas!). So, off I went to Hancock Fabrics with very little hope of finding anything there. The gods of fabric stores were smiling down on me that day because I found not one, not two, but three fabrics that I wanted to use (actually, one will be for Christmas). And TWO of those fabrics were in the discount pile!!!
I knew I didn’t want to go full on fall colors. As much as I love and want to copy the more subdued rooms I see in the blogosphere, I always seem to go for a punch of color, so I decided to embrace it this time and go with a blue, orange, brown theme. Here’s the first fabric I found:

Perfect! I actually already had some nubby, brown pillows at home, so now I just needed an orange fabric. I had already purchased some orange napkins and an orange table cloth that I thought I might be able to turn into pillows, but they were both just too bright. Finally, though (in that wonderful discount pile), I found a orange that matched the inspiration fabric perfectly!
Now, back home to make pillows…
No, wait. This is me we’re talking about here…
Now, back home to leave the fabric in a pile for a week and then decide I’m going to make pillows one day only to realize that I never actually washed the fabric and then do wash the fabric but lose my free time for the day so wait a few more days until I actually just decide to DO IT!
We have a ton of pillows hanging around in my closet doing nothing, so I knew I wanted to make envelope-type covers for existing pillows, rather than just adding to the pile of pillows that would need to be stored.
I’m sure you all know how to sew better than I, but just in case, I’ll share how I made them.
First! Cut the fabric. You’ll want to cut the front piece as big the same size as your pillow form, plus 1” for seam allowances. My pillows were 17”, so I cut the front piece in an 18” square.
The back is actually two pieces. You’ll want to cut those so that one dimension is the same as your pillow front (e.g., 18”). The other dimension will be half of the first dimension plus ~2.5” (e.g., 18/2 + 2.5” = 11.5”). These two pieces will overlap to create the pocket where you can insert your pillow form.

Next, iron your pieces flat! While you have the iron out, grab the two back pieces and press a nice hem on one side (of each of them). To do this, fold over the edge about 1/4” and press. Then, fold that pressed edge over one more 1/4” and press again. Then, take this over to the sewing machine and sew that hem down! This will be the nicely finished edge of each side of the pocket opening.

(Like my iron? It’s older than I am!)

Can you see the finished edge?
Now you get to start assembling the pillow. Pin one of the back pieces to the front piece, making sure you have the right side of the fabrics facing each other.

And sew that puppy on – just three sides. Don’t sew the envelope opening closed. It won’t work then…
Now, pin the second back piece to the other side of the front piece (right sides of fabric facing each other) and sew around the three closed sides. Note that the two back pieces will overlap when you add the second piece.

Now, turn it right-side out and stuff your pillow in (gently). Rejoice in the beauty of your new pillow.

This is actually a pretty easy sewing project. I was able to whip through three pillows in no time flat. And here they are:

I love how these look much more fall-y, but that they’re still bright and playful. And you know what’s almost the best part? I bought the orange fabric, the blue paisley, and a red fabric for Christmas – enough to make at least three pillows from each and the whole lot came to less than $15! Now that’s a project I can get behind.
Now, I just have to figure out how to take these fabrics over to the other couch which is dark brown. I don’t want to just have the same configuration over there, but I do want to pull the colors from this couch over there to balance the room. Any suggestions?


That paisley fabric is PERFECT! Nice job!
ReplyDeleteFo some reason I stink at pillow making...guess it takes some more practice. Thanks for posting 'cause yours turned out so nice. A little kick in the butt for me to keep trying.
ReplyDeleteThank you so much for posting the directions - I am just about to get my first sewing machine so I am a complete novice. This seems pretty simple!
ReplyDelete