
Earlier last week, my kids had their friends over for a few days and were well entertained without me, so I took the opportunity to start working on the landing.
I don’t know if I ever detailed my plan for the landing (which was plain, yicky composite board of some kind) and I’m too lazy to look that up right now, so I’ll just recap:
I took a page from Thrifty Decor Chick’s book and decided to try tongue and groove wood paneling on the floor. It’s thin and inexpensive – which made it perfect in my book. I primed and painted several coats of black before I actually put it down. Painting several coats of paint in all those grooves after it’s all put down on the floor did NOT appeal to me at all.

I also primed the landing floor in gray before a laid the paneling so that white primer would not show through, just in case there were gaps in the wood. (I didn’t actually think this would happen, but I wanted to be better safe than sorry since there was no way I’d be pulling up paneling to fix that.)

Then I grabbed my miter saw and got to work.

This was actually a pretty easy process. I basically cut the pieces to fit the full length of the landing and then randomly cut them in two pieces so that the seams would not always be in the same place (Note: I actually added an extra smidge for the width to account for the bit that the blade would take out when I cut it in two.)

I laid them all out before I glued them down, then came back through with Liquid Nails. I couldn’t figure out what to use to weigh down the wood while the glue took hold. The biggest, heaviest thing I could think of was myself. So, I grabbed a pillow, a book, and a drink and I laid out on the landing for about an hour. Periodically, I would change positions so that my weight was distributed all over the floor.
I didn’t get a picture of me doing this, but here’s my daughter helping out:

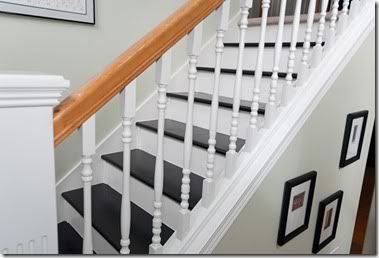
Here’s what it looked like when I was “done”:


At this point, I was feeling a bit nervous because the paneling creaked EVERY TIME you took a step on it. It got a bit better by morning time, but clearly something more needs to be done. I’m thinking lots and lots of nails!
BTW, I just have to mention how incredibly nice it was to spend most of a day on that landing and not have my nose crinkle up once! You may remember that the carpet here had seen some kitty accidents. Every time I walked by, I’d smell something – sometimes just a little and sometimes a lot). Now, it smells of nothing! I guess that makes treating it with a commercial odor remover a few times, spraying it several times with bleach, painting three coats of Kilz, and then sealing it with Polyurethane all worth while!


A little creak will just give you that old home feel and sound. They look good!
ReplyDeleteThat is impressive! They are looking so good. I love seeing the progress, you really doing a wonderful job.
ReplyDeleteAnd tomorrow you can curl up with a book all by yourself.
ReplyDeleteit is looking good so far! can't wait to see how it comes together.
ReplyDelete